

Build individual weight-class brackets
Use fixed weight-class brackets when entrants compete in declared classes and advance toward placements. Each division can have its own weight classes, match settings, and bracket formats.
Before opening Brackets
Section titled “Before opening Brackets”Confirm these items first:
- The event includes Individual competition.
- The applicable division uses Fixed weight classes.
- The division has its weight classes and match settings configured.
- The event roster contains the expected wrestlers.
- Weigh-ins and scratches are current, or you are preparing provisional brackets before weigh-ins.
- Each wrestler is assigned to the correct division and weight class.
- Any required final seeds are applied for the affected weight classes.
A fixed division with no weight classes cannot accept registrations or create useful brackets. Open the event’s competition setup to add or edit divisions and classes. Use the Wrestlers or Weigh-ins page to correct assignments before building.
If the event uses records, placements, points, or qualifications to calculate its order, complete Manage seeds for a weight-class tournament before creating the brackets. Applying a different seed order later does not rearrange an existing bracket.
Choose the division
Section titled “Choose the division”Open Brackets and select the division at the top of the page. Brackets, unassigned wrestlers, build status, and published-match warnings are scoped to that division.
If the page shows published matches for the division, entering Edit mode asks for confirmation. That warning means changed brackets will need publishing again; it does not mean the whole event must be rebuilt.
Set each division’s bracket types
Section titled “Set each division’s bracket types”Every fixed-weight division has its own list of bracket types: the formats Snapdown may use when it builds that division’s brackets, grows one after a wrestler move, or offers to downsize one after scratches. Different divisions can want very different things. Little kids might only wrestle round robins, while the high school division needs 16- or 32-man brackets.
A new division starts on Standard: 1-man byes, 2-man best of 3, 3-man round robin, 4-man, and 8-man WB-3rd, so up to 8 wrestlers. The Brackets page shows the current list on the division’s line (for example Standard · up to 8 wrestlers or Custom · up to 16 wrestlers).
You can change a division’s list from:
- the division’s menu on the Event Dashboard (Set bracket types) or the Bracket Types link on Brackets,
- the Bracket types card in the division’s settings,
- the Bracket types column in Manage Divisions, which also has Copy bracket types to copy one division’s list to the divisions you select,
- the first time you generate a division that has no list yet, when Snapdown asks whether to use Standard, the same list as another division, or Other bracket types… to start from Standard and add or remove types. If a weight class already has more than 8 wrestlers, it also suggests Standard plus the bigger brackets those classes need. Nothing changes until you choose.
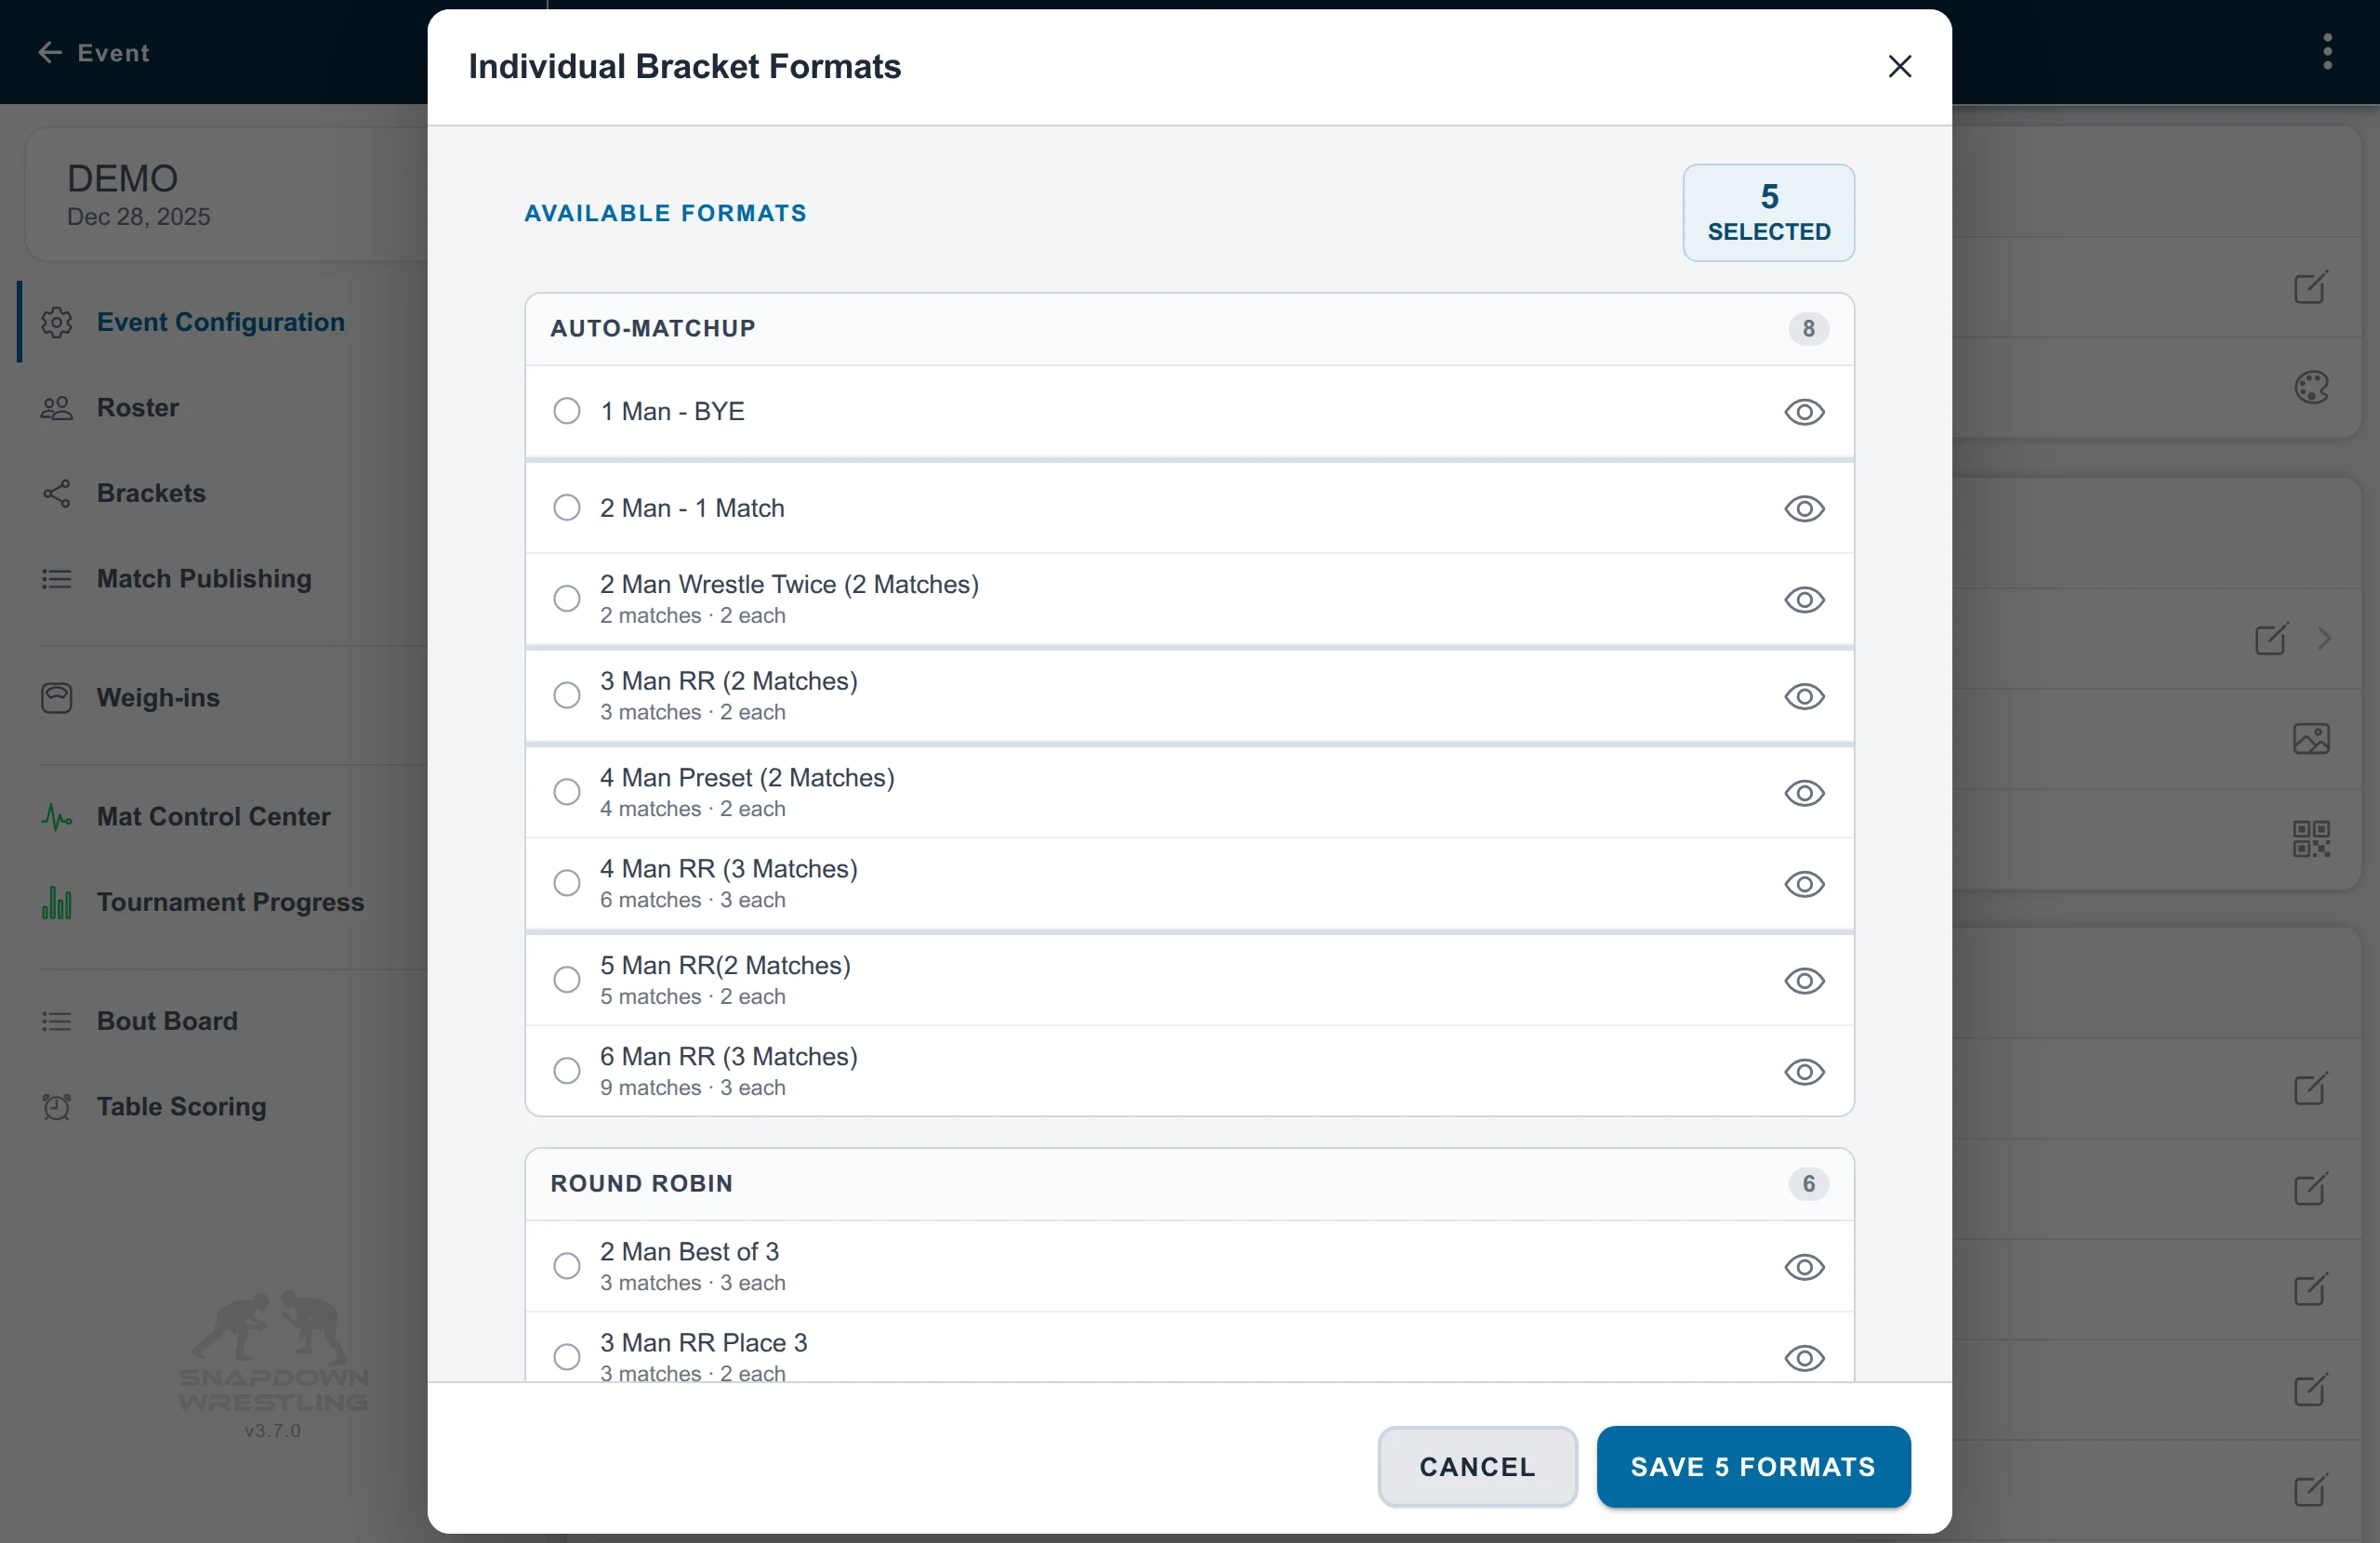
After you pick the types, Snapdown asks which other divisions should get the same list. Select matching divisions ticks every division that currently has the same list, which is handy when several divisions should move together.
Lists hold format families. WB-3rd and WB-5th are separate families; Top 4, Top 6, and Top 8 aren’t separate choices because Bracket Places decides those. Auto-matchup formats with no placements aren’t offered for fixed weight classes. Switching a division between fixed weight classes and automatic grouping resets its list, so automatic divisions go back to their matchup format’s own set.
Set the event’s Bracket Places under Scoring & Placements. A division can inherit that value or override it in Divisions. Snapdown combines the selected family and effective placement depth when it generates the concrete bracket. See Set bracket places and team-scoring places.
Create brackets from the weight classes
Section titled “Create brackets from the weight classes”Choose Add Brackets, then use one of these paths:
- Add Populated Brackets by Weight Class groups the current division’s wrestlers by assigned weight class, chooses a compatible bracket size, and places the wrestlers into the new brackets.
- Add Empty Bracket for Every Weight Class creates the class structure first so you can assign wrestlers manually.
- Add Brackets opens the bracket-format picker. Choose the quantity, format, and name, then fill the brackets yourself.
Snapdown warns when weight-class brackets with the same names already exist. Creating another set after that warning produces duplicates, so review the existing brackets before continuing.
Prepare brackets before weigh-ins
Section titled “Prepare brackets before weigh-ins”You can build fixed weight-class brackets ahead of weigh-ins using each wrestler’s registered weight-class assignment. Add Populated Brackets by Weight Class places the current roster into those classes. Check assignments before building, and treat the brackets as provisional until attendance and actual weights are confirmed. Divisions using automatic grouping can generate from registered weights; see Choose a matchmaking format and generate matchups.
After weigh-ins, open Roster and filter Not Weighed In. Confirm who did not arrive, then select one wrestler or all filtered wrestlers and use Actions → Scratch wrestlers… with the No-show — did not arrive reason. That clears their bracket spots. Review the result counts and any offered bracket downsizing before finalizing and publishing matches. See Run your tournament from weigh-ins to results for the event-day sequence.
Choose a bracket type manually
Section titled “Choose a bracket type manually”The bracket type picker for a single bracket lists the division’s types first, then everything else under Other types. Picking something outside the list is fine for a one-off bracket; it only changes that bracket, not the division’s list. The picker groups families into round robins, small medal brackets, elimination brackets, pigtail formats, and pool-to-bracket formats, with placement variants collapsed (16-man WB-3rd appears once, not as separate P4, P6, and P8 rows).
Choose a format that can hold the number of wrestlers in the class and follows the advancement path your tournament needs. Bracket Places supplies the placement depth. WB-5th has a minimum depth of Top 6 because that family inherently wrestles for fifth and sixth. If too many wrestlers are assigned, the bracket displays a capacity warning and must be resized before it can be built.
The division’s automatic list does not prohibit a deliberate one-bracket exception. If moving a wrestler would overfill a bracket that Snapdown can resize, and none of the division’s automatic types is large enough, Snapdown asks you to choose a larger compatible format or cancel the move. A format chosen as that exception is not automatically changed back to the division list later.
See Bracket formats and crossover rules for format behavior and placement details.
Review wrestler placement
Section titled “Review wrestler placement”Turn on Edit mode to adjust the bracket roster. Depending on the bracket, you can:
- assign an unassigned wrestler to a bracket;
- add a wrestler to an open slot;
- drag wrestlers between compatible brackets;
- move a wrestler to another bracket;
- swap two wrestlers; or
- remove or scratch a wrestler who should not compete.
Moving a wrestler across divisions updates the event’s division membership, and their registration’s division, as part of the move. A wrestler cannot be placed twice in the same destination bracket.
Explicit seeds are placed before unseeded wrestlers. Lower seed numbers have higher priority. For unseeded wrestlers, Snapdown preserves the applicable ranking or manual order and can separate teammates when the bracket has enough positions. Review any same-team warning before building; some small fields cannot avoid a teammate matchup.
If a class is too small, see Handle small weight classes and combine brackets.
Build and review
Section titled “Build and review”How brackets get built depends on the event’s scheduling mode.
- System Managed: you do not build brackets one at a time. Publish Schedule on Match Publishing builds every bracket, numbers the bouts, and loads the mats in one step. Brackets with results or a bout on a mat are the exception; they keep their own Build button.
- Director Managed: on Match Publishing, use a plan wizard such as Guided plan to choose the session, divisions, queues, and mats, then Save plan. Choose Run… on its row. Run offers to build missing brackets, then numbers the bouts, fills the queues, and loads the selected mats when you confirm. See Plan your tournament schedule. You can also build first on Brackets with Build, Build selected, or Build updates.
The status badges mean:
- Not Built: no current match structure has been saved;
- Out of date: the wrestlers or bracket structure changed after the last build; and
- Built: the saved matches agree with the current bracket.
Building on the Brackets page creates or updates the matches. To finish numbering, queueing, and loading them onto mats, continue at Match Publishing.
The separate Show and Hide actions control whether a bracket is visible to fans. They are not substitutes for building or publishing the match schedule.
Make changes before matches start
Section titled “Make changes before matches start”Before any affected bout starts, you can change wrestlers, resize a bracket, or change its format. Then publish the change:
- System Managed: the bracket shows Out of date. Open Match Publishing, choose Review changes…, check the Review schedule changes list, then choose Build & publish.
- Director Managed: return to Match Publishing and choose Run… on the affected plan, or Update & run… on an individual rule. Run updates the brackets for you; you do not need a separate build first.
A wrestler-only change that keeps the same bouts preserves their numbers. Growing or shrinking the bracket, or changing its match structure, renumbers only that bracket’s unwrestled bouts in round order. Keep Renumber everything off: other brackets keep their numbers, and labels such as 101.A fit the changed bouts between them. See Change brackets after publishing for the details.
Review bracket downsizing after a scratch
Section titled “Review bracket downsizing after a scratch”Removing a no-show can leave a bracket with empty slots. Snapdown can offer Review bracket downsizing after a scratch, and the Brackets page offers the same review for the selected division. The review shows each bracket’s current format, a smaller format from the division’s bracket types when one fits, and any reason it should stay as it is. Snapdown never downsizes into a format outside the division’s list, so add 5- or 6-man round robins to the list if you want small brackets to land there. Choose only the brackets you want to resize.
A bracket with started competition keeps its format. A director-chosen format outside the automatic choices, a team or pool format, or a bracket with fewer than two wrestlers may need individual review. After approving a smaller format, publish the change the same way as any other bracket change. If a resized bracket was already printed, the publish message lists it under Reprint.
Make changes after competition starts
Section titled “Make changes after competition starts”Active and completed bouts are competition history. Snapdown blocks ordinary restructuring when it would leave a partial bracket or detach a recorded result. Use withdrawal and targeted repair tools instead of deleting or renaming the event entry.
See these task-specific guides:
Also covers: save schedule · plan a schedule