

Set up divisions and weight classes
Divisions decide how wrestlers are separated. Each Individual division then has its own Competition setting: Fixed weight classes or Automatic grouping. One tournament can therefore group its younger divisions automatically while keeping traditional weight classes for its high school divisions.
Open the event in Event Admin, go to the Event Dashboard, and select Manage Divisions.
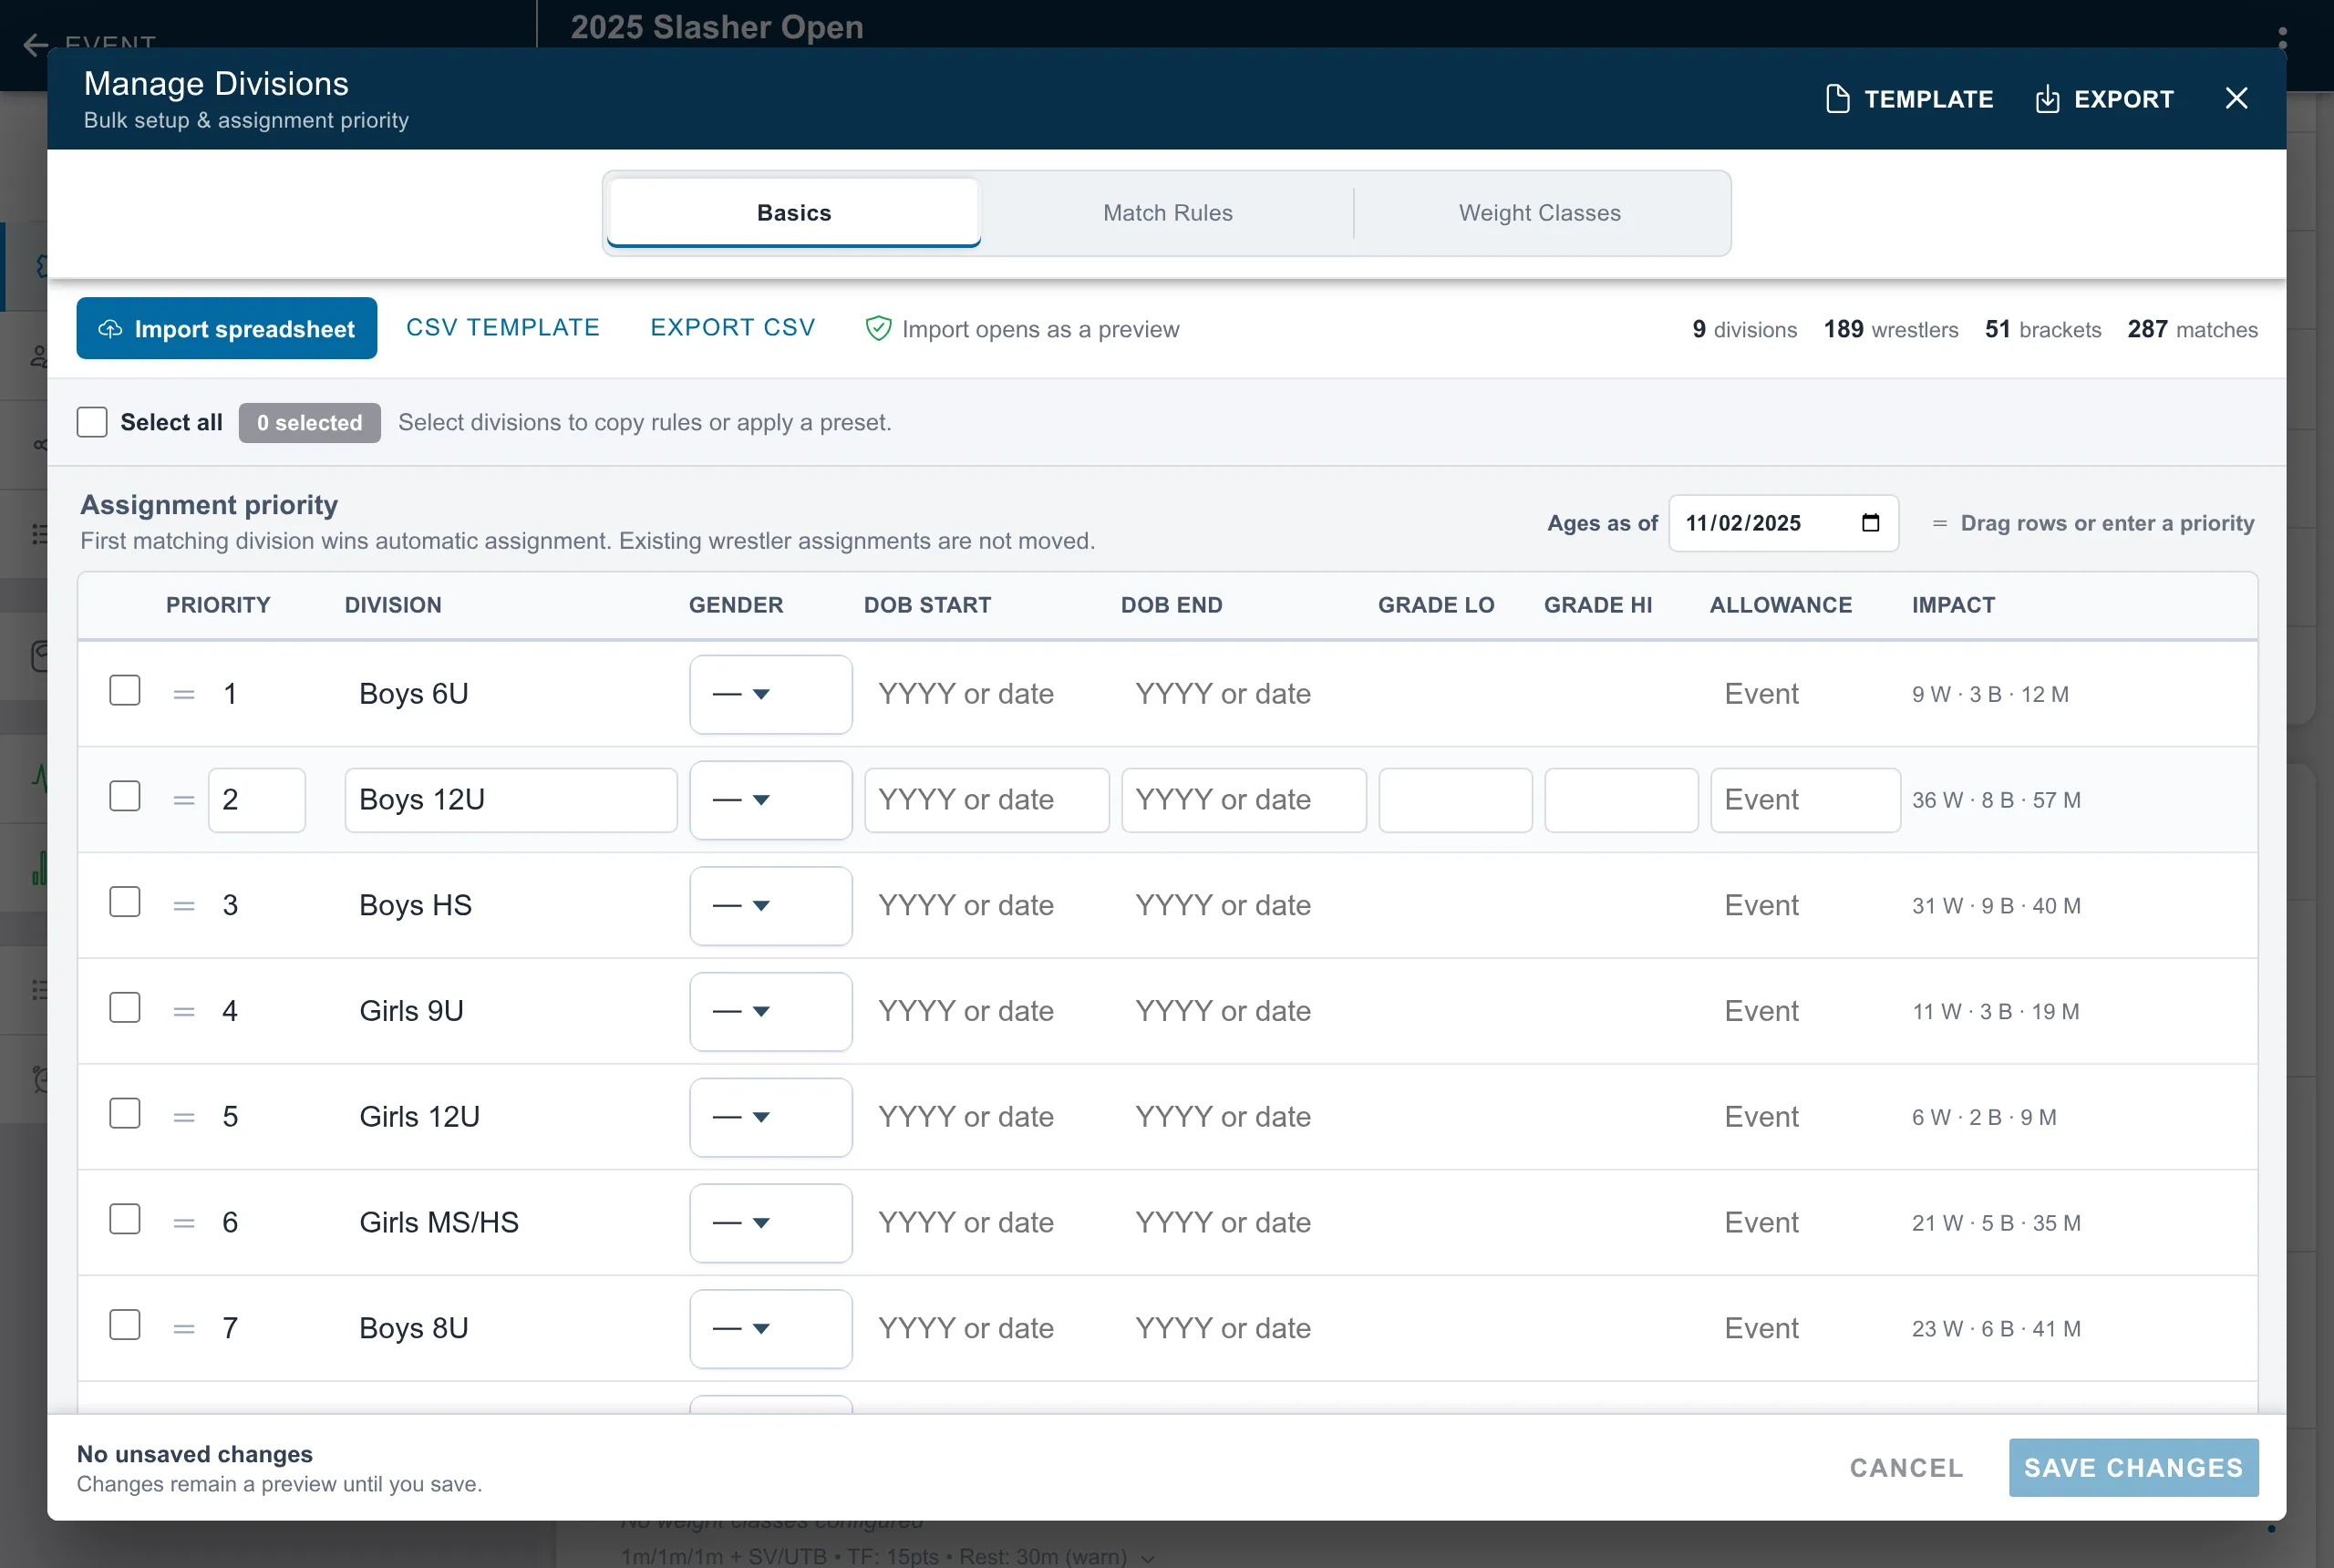
Choose the competition type for each division
Section titled “Choose the competition type for each division”On the Basics tab, choose independently for every Individual division:
- Fixed weight classes uses the predefined classes stored on that division, such as 106, 113, or 120. A wrestler in this division needs a weight-class assignment before a bracket can be built.
- Automatic grouping builds matches or groups from the wrestlers who actually enter or weigh in. Snapdown can consider current weight, age, grade, rank, gender eligibility, team separation, and previous opponents.
Automatic grouping controls which wrestlers are eligible for generation. The matchmaking format (Skill-Matched Brackets, Madison, Scramble Pairings, or Preset Two-Match Groups) is chosen when you generate the competition. See Choose a matchmaking format and generate matchups.
What the Default row does
Section titled “What the Default row does”The locked Default row supplies the starting competition type and rules for new or copied divisions. It does not force every division to use the same type, and changing it later does not overwrite existing division choices.
Create and order divisions
Section titled “Create and order divisions”Select Add division, then enter the division name and its eligibility criteria. A division can use any combination of:
- gender;
- earliest and latest date of birth;
- lowest and highest grade; and
- a division-specific weigh-in allowance.
Set Ages as of to the date on which ages should be calculated. The age hints beside the date-of-birth fields update from that date, which helps verify that the cutoff produces the intended age group.
Drag divisions into assignment order or enter their priority number. When a wrestler qualifies for more than one division, the first matching division wins automatic assignment. Reordering the rows does not move wrestlers who are already assigned.
The Impact column shows how many wrestlers, brackets, and matches currently belong to each division. Use it before changing a division with active event data.
Combine age and grade divisions
Section titled “Combine age and grade divisions”Many events run age divisions (6U, 8U, 10U, 12U) alongside grade divisions (Middle School, High School) in the same tournament. A division can use a date of birth range, a grade range, both together, or neither—each constraint you set is checked independently, and a wrestler only needs to clear the ones a division actually defines.
Grade eligibility is one-directional: a wrestler below a division’s lowest grade is allowed to wrestle up with no warning, but a wrestler above the highest grade is blocked at checkout. An admin who enters or moves them anyway gets a warning first and has to choose Enter anyway. This mirrors how age already works—wrestling up is normal, wrestling down against younger or lower-grade opponents is not.
- Grade too high (a 10th grader entering a Middle School division): blocked. This is the sandbagging guard: families can’t get past it, and an admin has to confirm it on purpose.
- Grade below the division’s range (a 7th grader entering High School): allowed silently as a wrestle-up entry.
- Grade left blank: the grade constraint passes open. Only the public registration form requires an entered grade, and only when at least one division in the event defines a grade range.
Grade is collected per event, at registration—it is not stored on the wrestler’s profile, since it changes every school year. Imported or previously-rostered wrestlers with no grade on file are never auto-matched into a grade-only division; assign them manually if they belong in one.
If you want a hard minimum age underneath a grade range (for example, USA Wrestling–style “grades 9–12 and born on or after a cutoff date”), add a date-of-birth bound to the same division. The two constraints combine with AND, so grade wrestle-up no longer bypasses the age floor.
Add weight classes
Section titled “Add weight classes”Open the Weight Classes tab and expand a fixed division. Add classes one at a time or paste a list separated by spaces, commas, or new lines. Their order controls how they appear in registration, roster tools, and bracket setup.
Select multiple divisions to copy a class list from one division to the others. Choose Replace list to make the destinations match the source or Add / update to preserve other destination classes.
Automatic divisions do not require weight classes. If an automatic division already has classes, Snapdown stores them but does not use them while the division remains automatic. They are available again if you switch the division back to fixed weight classes.
Weight classes and bracket types are separate settings. Weight classes decide who wrestles together; bracket types decide which formats the division’s brackets can use. New fixed-weight divisions start on Standard (up to 8 wrestlers). Change a division’s list from its menu, its settings, or the Bracket types column on Basics here, where Copy bracket types copies one division’s list to the divisions you select. See Set each division’s bracket types.
Set match rules and allowances
Section titled “Set match rules and allowances”The Match Rules tab stores the wrestling style, period lengths, overtime structure, technical-fall threshold, and other scoring rules for each division. On Match Rules, click a division’s rule summary to expand its settings:
- Choose the wrestling style.
- Under Championship Matches, set Period 1, enable the later periods you use, and enter each period’s time. Do the same under Consolation Matches if those bouts use different times.
- Set overtime and the other scoring rules where they apply to the style.
- Choose Save changes to save the workspace.
Period and overtime lengths are in seconds: enter 60 for one minute or 120 for two minutes.
The period checkboxes control whether periods 2 and 3 are used; the time fields control their
length. Set these before building bouts.
Select several divisions to apply a preset or copy all or part of one division’s rules to the others. Review the copied settings before saving.
The division’s Allowance column is on the Basics tab. An empty value
inherits the event’s weigh-in allowance. Enter a number to override it for that
division. An explicit 0 means that division has no allowance; it is different
from leaving the value empty. See Run weigh-ins for how the allowance
shows at the scale and on a two-day event.
Import, export, and review before saving
Section titled “Import, export, and review before saving”Use Template or CSV template to start a spreadsheet, and Export to download the current setup. Importing a spreadsheet opens a preview first. It does not save immediately, so review conflicts, overlap warnings, and the impact totals before selecting Save changes.
All edits in Manage Divisions remain a preview until you save the workspace. Closing or cancelling discards the preview.
Change a division after wrestlers or brackets exist
Section titled “Change a division after wrestlers or brackets exist”Changing a division from fixed weight classes to automatic grouping—or back again—does not silently delete or rebuild existing brackets. It changes how new registrations are collected and how future competition is built.
Before publishing matches, review the affected roster and rebuild or reconcile the competition intentionally. After matches have been published or scored, review the impact counts first and follow Change brackets after publishing matches.
League events
Section titled “League events”League events begin with their league’s divisions, competition types, and rules. You can adjust the event copy without changing the league defaults used by other events.